
Graphic facilitation is a way of using simple drawings, words, and symbols during meetings, workshops, and talks to help people understand ideas more clearly. I first learned about graphic facilitation at a UX conference where speakers were drawing live while talking. At first, I thought it was just a creative way to take notes, but later I realized it is a powerful tool that helps teams think better, share ideas more clearly, and remember more of what was discussed.
What is Graphic Facilitation and Why It Matters
Simple meaning of graphic facilitation
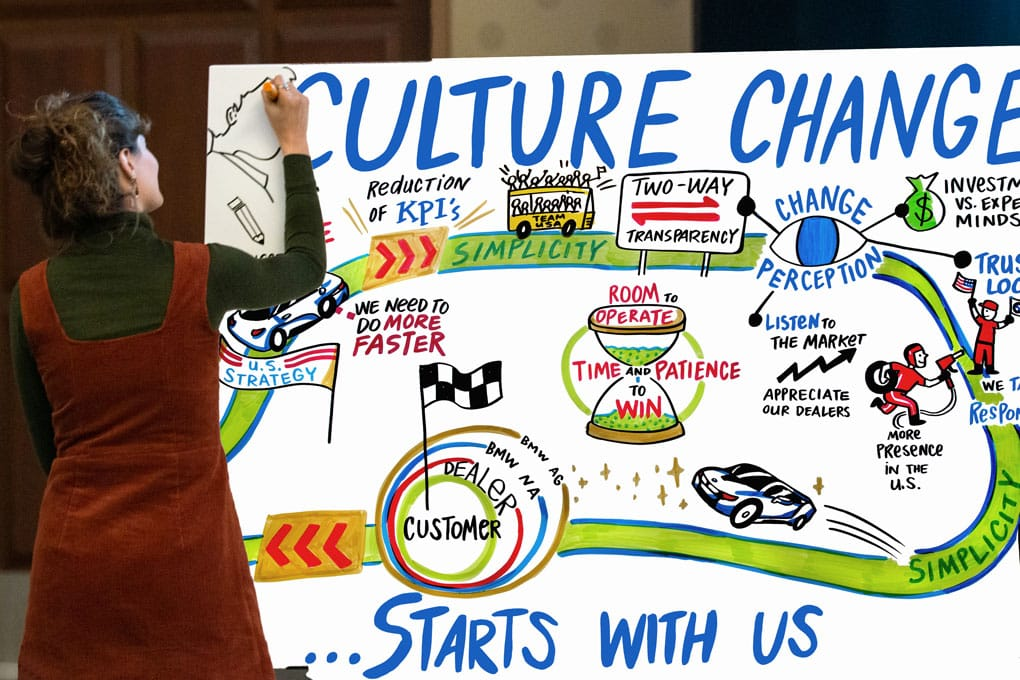
Graphic facilitation means using simple visuals like drawings, shapes, arrows, and short words to explain ideas during a meeting or discussion. Instead of writing long notes or only listening, ideas are shown in a visual way that is easier to follow.
It is not about making perfect or artistic drawings. Even very simple sketches can work well. The goal is to make ideas clear so everyone in the room can understand them at the same time without confusion.
This method is often used in meetings, group discussions, and workshops where many ideas are shared and need to be organized in a simple way.
How it helps teams work better
Graphic facilitation helps teams understand ideas faster because people can see the information instead of only hearing it. When ideas are drawn out, they become more real and easier to follow.
It also helps people remember things better. Most people remember images longer than spoken words, so simple drawings can help the team recall important points even after the meeting ends.
Another benefit is better focus. When someone is drawing during a discussion, the group tends to pay more attention. It keeps people more involved and active during the meeting instead of just listening quietly.
It also helps reduce confusion. When ideas are shown visually, everyone can look at the same thing and agree on what it means.
Different ways to use it
There are several simple ways to use graphic facilitation in daily work.
One way is live drawing during meetings. A person draws key points while others are speaking. This helps capture ideas as they happen.
Another way is using prepared templates. These are simple layouts made before a workshop, such as boxes or sections that guide the discussion. The team then fills them in together.
A third way is making meeting summaries. After a discussion, the main ideas are drawn in a simple visual form so everyone can quickly review what was decided.
All these methods help turn spoken ideas into clear visual notes.
How to Use Graphic Facilitation in Your Work
Tools you need to start
You do not need special or expensive tools to start graphic facilitation. Most of what you need is already easy to find.
You can use paper, a whiteboard, or even large sheets of craft paper. For drawing, simple markers are enough. Black is important for main text, and a few colors like blue or red can help highlight key ideas.
Sticky notes can also be helpful if you want to move ideas around during a workshop.
The most important thing is not the tools, but the habit of drawing ideas clearly so others can understand them easily.
Simple drawing tips
You do not need drawing skills to start. Basic shapes are already enough to explain most ideas.
You can use circles for ideas, squares for topics, arrows for showing direction or steps, and stick figures for people or teams. These simple shapes can explain almost anything in a meeting.
Try to keep drawings clean and easy to read. Avoid adding too many details that may confuse people. Simple is always better.
Also, use space wisely. Leave gaps between ideas so the board does not look crowded. Make important points bigger so people notice them first.
Easy templates you can use
Templates are helpful because they guide the flow of a meeting and keep things organized.
One simple template is an agenda board. This shows all topics for the meeting so everyone knows what will be discussed.
Another useful template is a pros and cons chart. This helps teams compare ideas by listing the good and bad sides clearly.
You can also use an action plan template. This shows tasks, who will do them, and when they need to be finished. It helps teams stay clear on next steps.
Feedback boards are also useful. They help teams write what went well and what can be improved after a project or meeting.
These templates make it easier to collect ideas and make decisions together.
How to practice and improve
The best way to get better at graphic facilitation is to practice often in small and simple ways.
You can start by taking handwritten notes instead of typing during meetings. This helps you get used to drawing ideas quickly.
You can also copy simple visual examples you find online. Copying helps you learn basic styles and shapes that you can later use on your own.
Another good practice is to draw while listening to talks or podcasts. Pause when needed and try to sketch the main ideas.
You can also use graphic facilitation in daily life, like making to-do lists or planning your day with simple drawings.
The more you practice, the easier and faster it becomes.
Why it is worth using
Graphic facilitation is worth using because it makes communication clearer and easier for everyone. It helps teams see ideas in a simple way instead of only hearing or reading them.
It improves teamwork because people can share the same visual understanding of a topic. This leads to fewer misunderstandings and faster decisions.
It also makes meetings more engaging and active. People pay more attention when they can see ideas being built in real time.
Most importantly, it is easy to start. You do not need to be an artist or expert. With simple tools, basic shapes, and regular practice, anyone can use graphic facilitation to improve how they work with others.